A Step-by-Step Guide to Split Boulder Opal
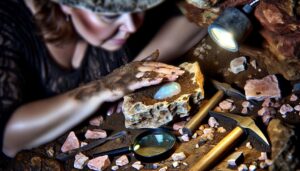
So, you're interested in splitting a boulder opal, are you? You've got your diamond saw, chisel, and hammer ready, and now you're trying to figure out the best way to split this precious gem without causing any damage. It's a delicate task that requires a steady hand, an eye for detail, and a good understanding of the boulder opal's structure.
Get it right, and you'll reveal the opal's stunning colors and patterns, hidden within the ironstone matrix. But how exactly do you tackle this? Stick around, you're about to find out.
Key Takeaways
- Identify the opal vein in the boulder using a magnifying glass and wetting the stone for enhanced visibility.
- Prepare the boulder for splitting by using a diamond saw and diamond grinding wheels, ensuring a clean and dry workspace.
- Apply the correct splitting technique by tracing the seam or fault line with a tool and applying even pressure with a chisel and mallet.
- Post-splitting, carefully examine the opal for color, texture, cracks, and overall integrity, ensuring a clean and even split.
- Polish the split boulder opal using a softer wheel and diamond paste, generating friction and heat for a gleaming finish.
Understanding Boulder Opal's Structure
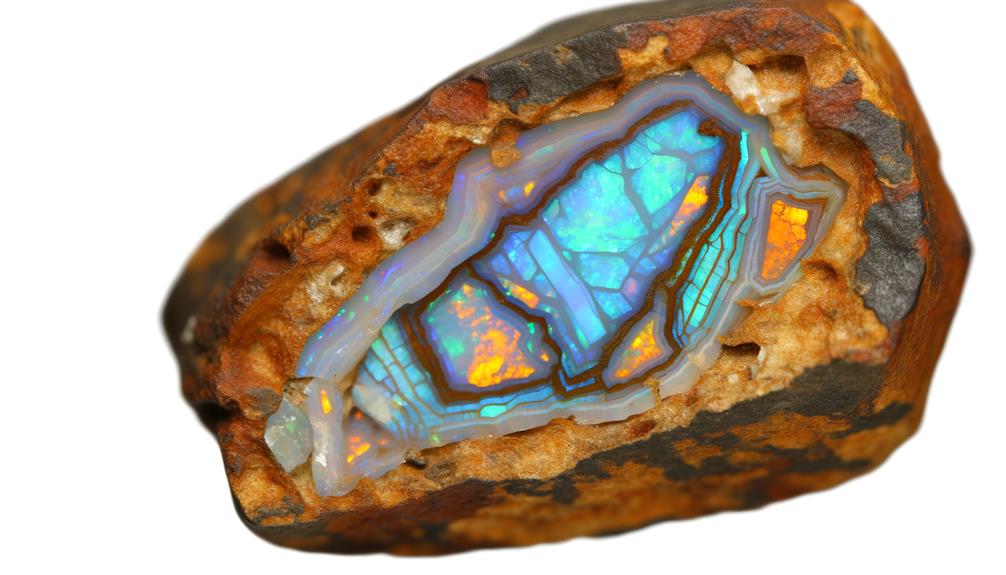
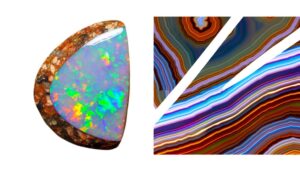
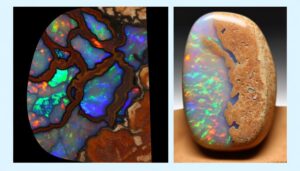
To fully grasp the process of splitting boulder opal, you must first understand its unique structure, which is characterized by a vivid play of color encapsulated within ironstone. Boulder opals are distinctive due to their veins of precious opal embedded within the host rock. This formation results in an intricate, layered appearance, where the opal appears as if it's suspended in a matrix of ironstone.
The structure of this gemstone isn't homogenous, but rather a complex, interwoven network of opal and ironstone. Each piece is unique, with the opal's color, pattern, and brightness varying greatly. Understanding this structure is pivotal in successfully splitting the opal.
You need to identify the opal veins and determine the best place to split, while minimizing damage. This requires meticulous examination and strategic planning.
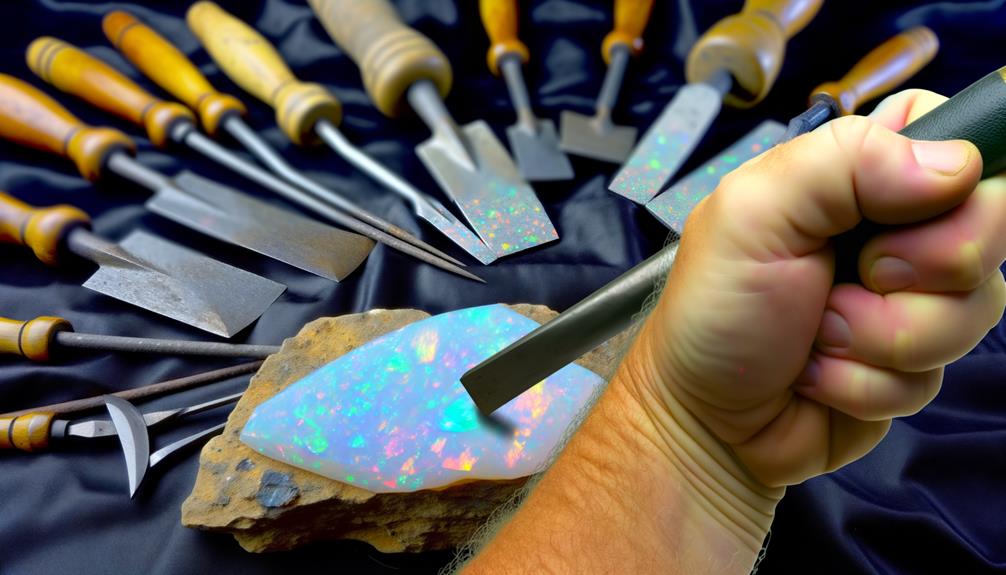
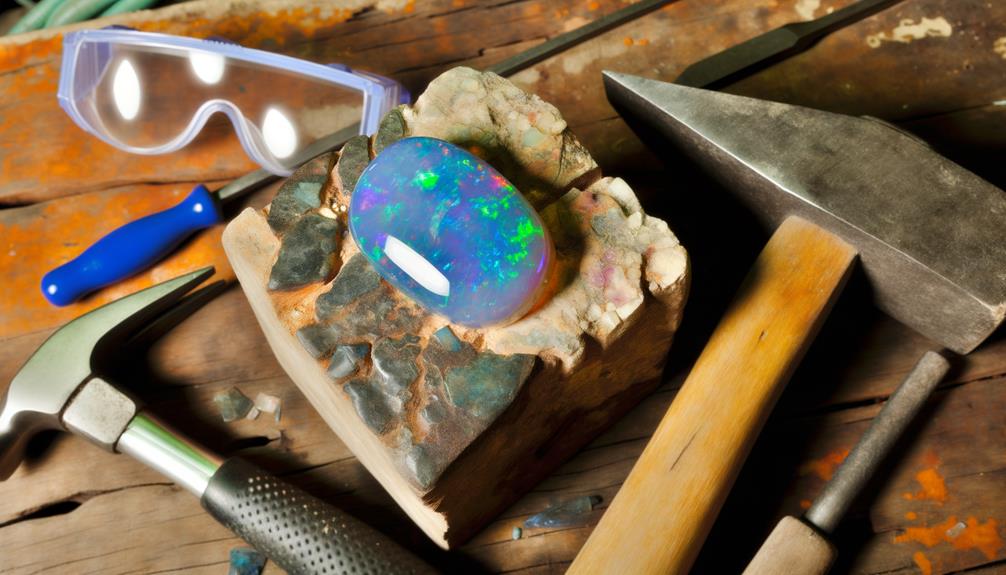
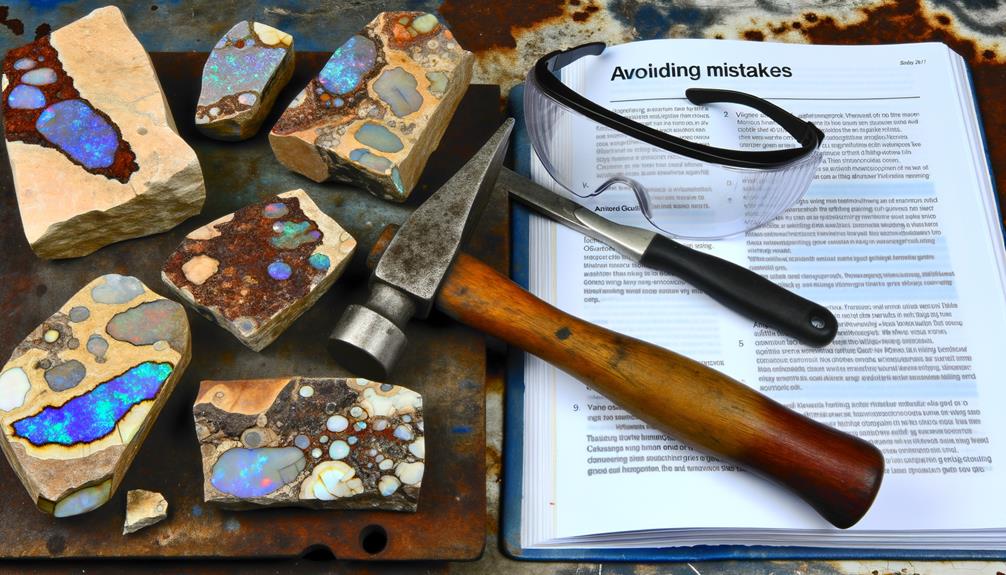
Necessary Tools for Splitting Opals
Before you start on the task of splitting a boulder opal, you'll need to gather the right tools, essential for ensuring precision and minimizing damage to the gemstone.
The first and foremost tool you'll need is a sturdy vice to hold the opal securely. Next, a chisel of good quality is important for clean splits. Opt for a chisel with a thin, sharp edge, as it offers better control and less risk of shattering the opal.
It's also important to have a small hammer for accurate, controlled strikes on the chisel. Safety glasses are a must to protect your eyes from potential flying debris.
Lastly, don't forget a polishing cloth or brush for cleaning the split surfaces. With these tools, you're set to split your boulder opal with precision and care.
Safety Measures Before Starting
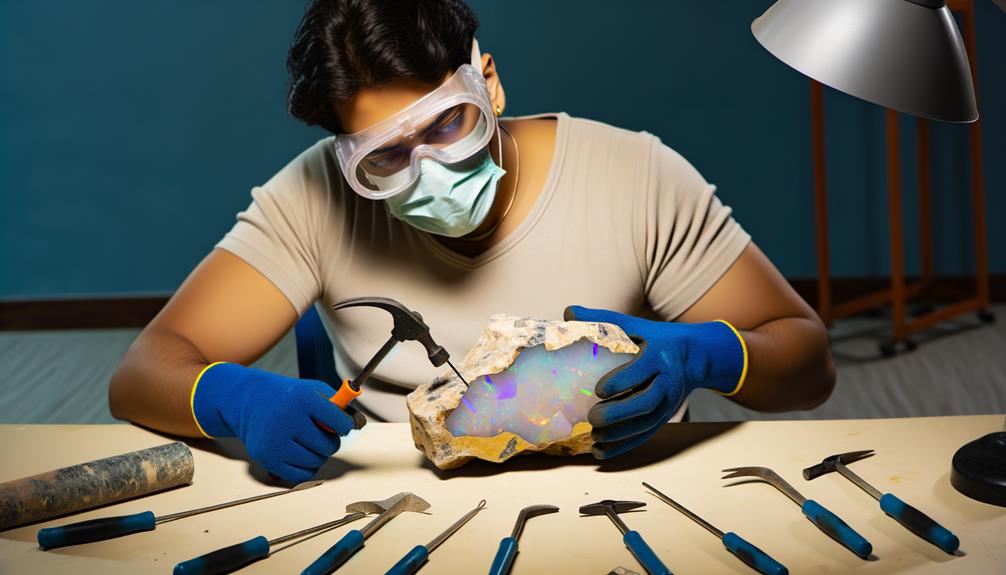
Before you begin splitting boulder opal, it's crucial that you prioritize safety. This involves having the right protective equipment, which we'll outline in the following discussion.
Additionally, you'll need to carry out pre-operation safety checks to make sure you're starting on the right foot.
Protective Equipment Essentials
Ensuring your safety when splitting boulder opal is critical. Equipping yourself with the necessary protective gear is paramount. Start with safety goggles. These are essential to shield your eyes from flying debris.
Next, wear a dust mask or respirator to safeguard your lungs from inhaling dust particles. Don't forget gloves, as they offer protection against sharp edges while handling these precious stones. A sturdy apron can prevent injury from errant chips.
Also, consider investing in heavy-duty boots to guard your feet. Finally, noise-cancelling headphones are advisable if you're using power tools, as they can produce high decibel levels.
Pre-Operation Safety Checks
Having your protective gear in place is just the beginning; conducting safety checks before initiating the opal-splitting operation is equally essential. You must make sure that the workspace is clean, well-lit, and free from unnecessary clutter. The tools should be in good condition and properly sharpened. Here's a handy checklist to guide you:
| Check Area | What to Look For |
|---|---|
| Workspace | Clean, well-lit, clutter-free |
| Tools | Good condition, properly sharpened |
| Protective Equipment | Correct fit, no damages |
| Ventilation | Good airflow, no dust |
| Emergency Plan | Up to date, accessible |
Don't overlook these checks. They not only secure your safety but also impact the quality of your opal splitting. Remember, precaution is better than cure, and a safe workspace is key to successful opal splitting.
Locating the Opal Vein
To successfully split a boulder opal, you must first discover the gem's opal vein, a critical step that requires both precision and a keen eye for detail. This vein is typically a thin, colorful line running through the boulder, indicating the richest concentration of opal.
It's usually not visible on the surface, so you'll need to carefully examine the stone under good lighting, turning it slowly to catch reflections and color changes. Using a magnifying glass can help you spot the vein more easily. If you're struggling to locate it, try wetting the boulder; water can enhance the opal's color and make the vein stand out.
Preparing the Boulder for Splitting
Before you move onto splitting your boulder opal, it's essential to prepare it properly.
This involves gathering the necessary tools, conducting a thorough inspection of the boulder opal, and taking care of the boulder before the split.
This strategic preparation can enhance your chances of successfully splitting the boulder without damaging the precious opal inside.
Gathering Necessary Tools
You'll need to assemble a set of specific tools to properly prepare your boulder opal for splitting. First up, a diamond saw is essential. Due to its hardness and precision, it can easily cut through the rock without causing excessive damage.
A set of diamond grinding wheels is next on the list. They're used to smooth the surface and eliminate any rough edges.
You'll also need a fine tip point scribe for marking the opal, ensuring accurate splitting.
Safety gear is non-negotiable. Always wear protective goggles and gloves to shield yourself from potential harm.
Boulder Opal Inspection
Having gathered all the necessary tools, it's time to closely examine your boulder opal, preparing it for the splitting process. Pay attention to its shape, size, and the visible color play.
Identifying the plane of cleavage, which is the natural line along which the opal is likely to split, is essential. It's usually identifiable as a thin, flat area. Look for any cracks or fissures on the surface. These are weak points and the stone might break unpredictably if hit there.
Also, evaluate the solidity of the boulder. If it's too fragile, it might shatter during splitting. Remember that understanding your opal's unique characteristics will increase the chances of a successful split, preserving its beauty and value.
Pre-Splitting Boulder Care
Once you've thoroughly examined your boulder opal, it's important to take several steps to prepare it for splitting, aiming to minimize potential damage and maximize the preservation of its inherent beauty. Alongside this, you should consider the ambient environment.
A dry, dust-free workspace is ideal to prevent any foreign particles from infiltrating the opal's natural crevices.
Next, make sure your opal is completely dry. Any residual moisture can cause unexpected fractures during splitting. To further safeguard the opal's structural integrity, gently clean its surface with a soft brush to remove any loose material.
The Correct Splitting Technique
To split a boulder opal correctly, it's essential to understand and apply the precise technique, which begins with identifying the seam or fault line in the stone. With a fine-pointed tool, trace this line, marking a path for the split.
You'll then need a chisel and a small mallet. Place the chisel's edge along the marked line, applying even pressure. It's key not to rush; patience will reward you with a clean split.
With your mallet, tap gently but firmly on the chisel, following the line you've marked. Listen for changes in sound – a deeper, hollow tone indicates the split is beginning. Stop immediately when you hear this, to prevent over-splitting.
Carefully Inspecting the Split
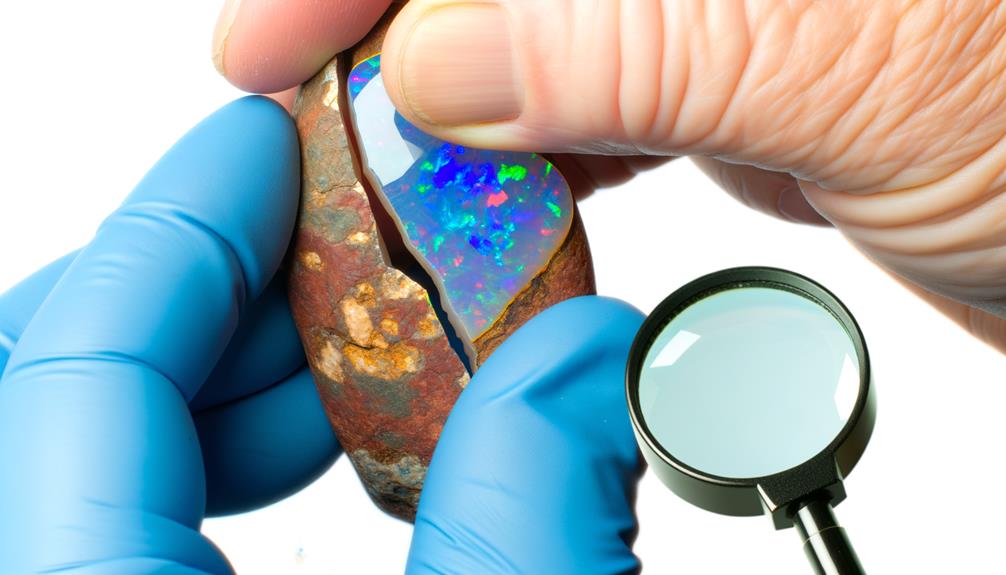
Now that you've split your boulder opal, it's important to carefully inspect the split. Start with a thorough examination of the boulder's initial appearance and gradually focus on identifying the opal layers.
Initial Boulder Examination
What do you see when you carefully inspect the split in your boulder opal? You're not just looking for the obvious color and texture. You're seeking anomalies, inconsistencies, cracks, and the overall integrity of the stone. It's essential to guarantee that the split is clean and even. This initial examination is pivotal, as it's your first chance to gauge the quality of the opal and potential challenges you may face.
Check the stone's surface. Is it smooth or rough? Are there any visible inclusions or defects? The more you understand the opal's characteristics, the better you can predict its behavior during the splitting process.
Identifying Opal Layers
After a thorough initial examination, your focus should shift towards identifying the various opal layers within the split, taking particular note of their color, thickness, and continuity.
Look carefully at the opal's play-of-color, which should reveal the presence of multiple layers. Thin layers might contain bright, vivid colors while thicker ones tend to have softer hues.
Next, assess the continuity of the layers across the split. Uninterrupted layers signify a well-formed opal, while intermittent ones suggest possible flaws.
Don't rush this step as it's essential in determining the opal's value and potential.
Splitting Precautions & Techniques
Before starting the process of splitting the boulder opal, it's essential to carefully examine the split to guarantee minimal damage and maximize the value of the precious gemstone. You should scrutinize the opal's shape, structure, and the visible layers. Look for any fault lines or cracks that might propagate when pressure is applied. If these exist, it's best to adjust your splitting strategy accordingly.
The technique employed should prioritize preserving the opal's features and color play. Always use professional tools and wear safety glasses to prevent any harm. A gentle, controlled force is recommended while splitting. Over-exertion can lead to irreparable cracks, decreasing the gem's value. Remember, patience and accuracy are paramount in this delicate task.
Polishing the Split Boulder Opal
Ever wondered how to transform a split boulder opal into a gleaming gemstone? The magic lies in the polishing process, which brings out the opal's hidden beauty.
- Smooth Out the Rough Edges:
Start by using a grinding wheel or a dremel tool. You'll want to remove any uneven surfaces and shape the opal to your desired form.
- Polish the Opal:
Next, use a softer wheel with a diamond paste. It's the friction and heat generated that'll give your opal that sought-after shine.
- Finish with a Clean:
Tips for Avoiding Mistakes
While the polishing process can enhance the opal's beauty, it's equally vital to be mindful of potential errors that could diminish the gemstone's value.
First, always use a low-impact, precision tool to avoid breaking or chipping the stone.
Second, never rush the process. Patience is key in retaining the opal's integrity.
Third, don't overlook the significance of regular tool maintenance. Dull or faulty tools can cause unintended damage.
Fourth, remember to continuously assess the opal's condition throughout the splitting process, making small adjustments as necessary.
Lastly, educate yourself on the unique properties of boulder opals; their hardness, internal structure, and fracture patterns are important factors to consider when splitting.
Avoiding these common mistakes can ensure a successful and rewarding opal splitting experience.
Case Study: Successful Boulder Opal Splitting
Diving into a real-world example, let's explore a case where careful planning, knowledge and precision led to a successful splitting of a boulder opal.
- Planning: The splitter studied the stone meticulously, identifying the potential fault lines and mapping out the best angle for the split.
- Knowledge: With years of experience, they understood the stone's natural grain and patterns, using this to guide their technique.
- Precision: Finally, the splitter used a specialized tool, applying gentle pressure at the right point.
This case demonstrates the importance of these three factors in successfully splitting a boulder opal. Careful planning, deep knowledge, and precise execution are the keys to revealing the true beauty of these unique stones. You too can achieve this with practice and patience.
Conclusion
In the end, the art of splitting a boulder opal is a delicate dance between man and nature. With careful preparation, precise tools, and a keen eye, you can reveal the hidden beauty within these unassuming stones.
But remember, each fracture is a lesson learned, not a failure. So, embrace the journey and relish in the thrill of unveiling the vibrant hues and mesmerizing color play that make boulder opals a truly enchanting gemstone.