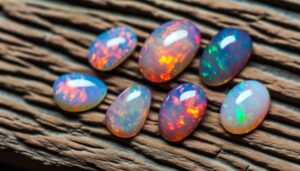
5 Essential Steps to Polish Ethiopian Opal Like a Pro
To polish Ethiopian opal, first gather tools like a trim saw, diamond wheels, and polishing powder. Inspect your opal for fractures and hydrophane properties.
Organize a stable, well-lit workspace with proper ventilation. Begin shaping with a diamond wheel, ensuring the opal remains cool using a water drip system.
Proceed to wet sanding with sequential grits, maintaining a moist surface. Clean your opal with mild soap and a soft brush, ensuring thorough drying.
Store the opal in a breathable container with silica gel to control humidity. Mastering these steps will reveal the opal's true brilliance and intricacies.
Key Takeaways
- Inspect opal for fractures, inclusions, and hydrophane properties before starting the polishing process.
- Use a trim saw and diamond wheels for initial shaping, ensuring to keep the stone cool with a water drip system.
- Perform wet sanding with sequential grits, starting coarse and ending fine, maintaining a wet surface throughout.
- Clean opal using mild dish soap, distilled water, and a soft brush with gentle circular motions.
- Store polished opals in a breathable container with silica gel packets, avoiding direct sunlight and extreme temperature changes.
Gather Necessary Tools
To begin the process of polishing Ethiopian opal, you'll need to assemble a precise set of tools including a trim saw, various grits of diamond wheels, and a cerium oxide polishing powder. The trim saw allows you to cut the rough opal to a manageable size, guaranteeing minimal wastage.
Diamond wheels, which come in different grits, are essential for sequential grinding and smoothing of the opal surface. Start with a coarse grit and gradually move to finer grits to achieve a uniform texture.
Inspect Your Opal
Carefully scrutinize your Ethiopian opal under a well-lit magnifying lens to identify any fractures, inclusions, or color patterns that could affect the polishing process. This close examination is essential for understanding the stone's structural integrity and visual characteristics.
Pay attention to the following aspects:
- Fractures: Look for any visible lines or cracks that may compromise the opal's stability.
- Inclusions: Identify any foreign materials trapped within the opal that could influence the polishing outcome.
- Color Patterns: Note the distribution and intensity of colors, as these will guide your polishing technique.
- Hydrophane Properties: Ethiopian opals often exhibit hydrophane behavior, absorbing water, which can affect their appearance and handling.
Prepare the Workspace
After thoroughly examining your Ethiopian opal, make certain your workspace is organized and equipped with the necessary tools for a precise and efficient polishing process. Position an adjustable light source to illuminate your work area adequately.
Confirm your workbench is stable and free of clutter. Assemble diamond-tipped burs, polishing pads, and a variable-speed rotary tool. Use a soft-bristle brush and distilled water for cleaning debris.
Place a magnifying lamp nearby for detailed inspection. Have a micrometer on hand to measure the opal's dimensions accurately. Maintain a clean, dry cloth for wiping hands and tools.
To wrap up, make sure proper ventilation is in place to avoid inhaling fine particulates. This meticulous setup will facilitate a controlled environment, essential for achieving professional-grade results.
Initial Shaping
Commence the initial shaping by securing the Ethiopian opal firmly in a dop stick, ensuring stability during the grinding process.
Use a diamond grit wheel to begin rough shaping, maintaining even pressure to avoid fracturing the stone. Constantly monitor the opal for signs of heat buildup, which can cause cracking.
Key steps include:
- Marking the desired shape: Outline the contours with a fine-tipped marker.
- Setting the appropriate wheel speed: Adjust the speed to a moderate setting to control material removal.
- Employing a water drip system: To cool the opal and minimize dust.
- Making gradual passes: Slowly grind away excess material to achieve the preliminary shape.
These steps help you precisely shape the opal while preserving its structural integrity and unique play-of-color.
Sanding Process
You must first select the appropriate sandpaper grit to effectively refine the opal's surface.
Implement a wet sanding technique to reduce heat and friction, ensuring the opal's integrity.
Conclude with the final sanding steps to achieve a smooth, polished finish.
Choosing Sandpaper Grit
Selecting the appropriate sandpaper grit is essential for achieving a smooth and polished finish on Ethiopian opal, as it directly influences the efficiency and quality of the sanding process. Start with coarser grits to remove larger imperfections, then progressively move to finer grits for detailed smoothing.
Here's a detailed approach:
- 220-grit: Ideal for initial shaping and removing larger scratches.
- 400-grit: Used for refining the shape and eliminating medium-sized abrasions.
- 600-grit: Smoothes out finer scratches, preparing the surface for final polishing.
- 1200-grit: Offers a pre-polish that enhances the stone's clarity and luster.
Each grit level serves a specific purpose, ensuring a meticulous and controlled progression towards a polished Ethiopian opal.
Wet Sanding Technique
For best outcomes during the wet sanding process, consistently keep the sandpaper and opal surface moist to minimize friction and prevent heat buildup.
Start with a coarse grit, such as 400, and work systematically through finer grits, like 600, 800, and 1200.
Utilize a constant water flow to flush away debris and maintain surface lubrication. Employ uniform pressure to avoid uneven surfaces and potential fractures in the opal.
Monitor the opal's surface regularly, ensuring an even reduction of scratches. The water's cooling effect is vital in preserving the opal's integrity and preventing thermal shock.
Maintain a steady, circular motion, which aids in achieving a smooth, polished finish, essential for shifting to the subsequent sanding steps.
Final Sanding Steps
Moving to the final sanding steps involves utilizing ultra-fine abrasives, such as 1500 and 2000, to achieve a glass-like smoothness on the opal's surface. At this stage, precision is crucial. Maintain consistent pressure and keep the surface wet to prevent any heat buildup.
- Use 1500 grit sandpaper: Begin by sanding in a circular motion to smooth out minor scratches.
- Switch to 2000 grit sandpaper: Further refine the surface, guaranteeing an even finish.
- Inspect frequently: Examine under a magnifying glass to detect any remaining imperfections.
- Clean thoroughly: Rinse the opal with distilled water to eliminate any abrasive particles.
This meticulous approach guarantees the opal's surface is impeccably prepared for the final polishing phase.
Pre-Polish Steps
Before you can achieve a high-quality shine on Ethiopian opal, make certain that the stone is thoroughly cleaned and free of any debris or contaminants. Start by soaking the opal in distilled water for at least 24 hours to eliminate any soluble impurities.
Use a soft brush to gently scrub the surface, making sure not to scratch the delicate material. Once cleaned, inspect the opal under magnification to identify any remaining inclusions or fractures. If necessary, use a fine diamond file to smooth out any imperfections.
Dry the stone completely using a lint-free cloth, as moisture can interfere with subsequent polishing steps. By meticulously preparing the opal, you'll achieve optimal results in the final polishing phase.
Final Polishing
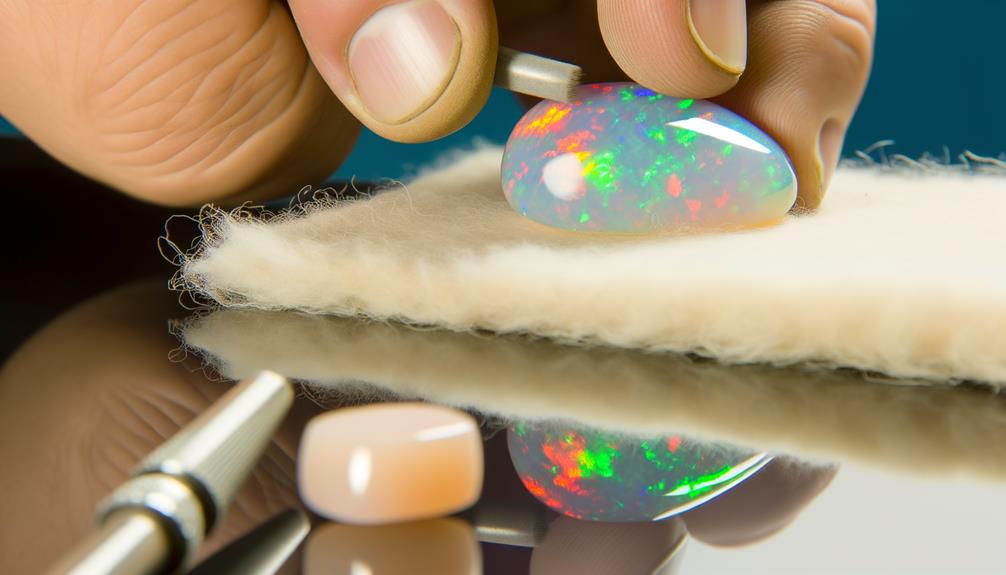
Achieving a mirror-like finish on Ethiopian opal requires the application of progressively finer grit polishing compounds. Start with 14,000 grit and move up to 50,000 grit diamond paste.
Begin by applying a small amount of 14,000 grit paste on a felt polishing wheel. Maintain a consistent speed to avoid generating excess heat, which can damage the opal.
Progressively move to finer grits, ensuring each stage removes scratches from the previous one.
Apply 14,000 grit diamond paste with a felt wheel. Switch to 50,000 grit paste for final polishing.
Use minimal pressure to prevent heat buildup. Inspect the opal frequently for a flawless finish.
Following these steps meticulously will yield a lustrous, high-quality polish.
Cleaning the Opal
When cleaning Ethiopian opal, you must select gentle cleaners with a neutral pH to avoid damaging the stone's delicate structure. Employ soft brush techniques to remove debris, ensuring you don't scratch the surface.
After cleaning, dry the opal thoroughly and store it in a controlled environment to maintain its integrity.
Choosing Gentle Cleaners
Selecting the appropriate gentle cleaners is crucial to maintaining the structural integrity and vibrant play-of-color of Ethiopian opal. When cleaning, you must avoid harsh chemicals that could harm the opal's delicate hydrophane structure. Opt for pH-neutral solutions that guarantee minimal interaction with the gem's silica matrix.
Consider these gentle cleaners:
- Mild dish soap: Free of dyes and fragrances, to prevent abrasive residues.
- Distilled water: Reduces the risk of introducing mineral deposits.
- Baby shampoo: Gentle formulation that cleans without stripping moisture.
- Specialized gemstone cleaners: Specifically designed for opals, ensuring safe usage.
Each cleaner must be carefully vetted for compatibility with Ethiopian opal's unique properties, guaranteeing both cleanliness and preservation of its natural beauty.
Soft Brush Techniques
To ensure the gentle cleaners work effectively without damaging the opal, employ a soft brush with fine bristles to delicately remove dirt and grime from the gem's surface.
Choose a brush with natural or synthetic fibers that are non-abrasive. Use gentle, circular motions to dislodge particulate matter, making sure not to apply excessive pressure that could scratch the opal. This approach utilizes mechanical action to enhance the efficiency of the cleaning solution.
Pay attention to crevices and intricate areas where debris might accumulate. By maintaining a consistent, light touch, you prevent potential surface damage while achieving a thorough clean.
For best results, periodically rinse the brush to avoid redepositing contaminants back onto the opal.
Drying and Storing
After cleaning your Ethiopian opal, make sure it's thoroughly dried using a soft, lint-free cloth to prevent any moisture retention. This step is vital since opals are hydrophane and can absorb water, leading to potential cracking or color changes.
Store the opal in a stable environment to maintain its integrity. Use a breathable container to avoid trapping humidity. Here are key storage tips:
- Use silica gel packets to control moisture levels.
- Avoid direct sunlight to prevent dehydration and fading.
- Maintain a consistent temperature to reduce thermal stress.
- Store separately to prevent scratching and physical damage.
Storing Finished Opals
Properly storing finished Ethiopian opals requires maintaining a stable environment to prevent dehydration and potential cracking. Control humidity levels around 50-60%. Avoid extreme temperature fluctuations, as rapid changes can stress the opal's structure. Use airtight containers to minimize exposure to dry air.
Here's a quick reference table:
| Storage Aspect | Recommended Approach |
|---|---|
| Humidity | 50-60% |
| Temperature | Stable, avoid fluctuations |
| Container Type | Airtight |
Additionally, store opals away from direct sunlight, as UV exposure can degrade their vibrant colors. Consider using silica gel packets inside storage containers to absorb excess moisture. By following these guidelines, you'll maintain your Ethiopian opals' brilliance and structural integrity.
Conclusion
By meticulously following these steps, you'll transform raw Ethiopian opal into a dazzling gemstone.
But consider this: some believe opals hold metaphysical powers, enhancing creativity and emotional expression. While scientific evidence remains elusive, your polished opal might just ignite that spark of inspiration.
So, as you store your finished opal, appreciate not only its physical beauty but also its potential to influence and elevate your artistic endeavors.


