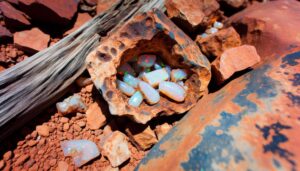
Regions Known for Potch Opal Found
To turn potch into opal, start by selecting high-quality potch with a consistent matrix and slight translucence. Inspect for any fractures or inclusions.
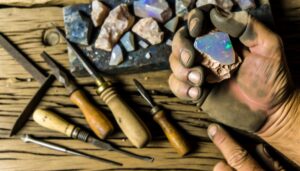
Prepare a well-lit workspace and secure the potch with a vice. Use diamond-tipped tools to trim and shape, ensuring you follow the opal veins.
Employ progressive grits of diamond paste for meticulous polishing, starting from 3,000 up to 50,000 grit to enhance the natural luster. Mount the potch securely and trim excess material with a diamond blade saw.
Monitor under various lighting conditions to optimize color and pattern visibility. Advanced techniques await in further sections.
Key Takeaways
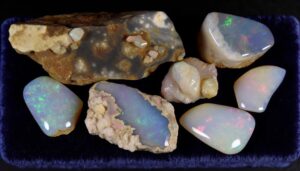
- Select high-quality potch: Choose potch with a uniform matrix, minimal fractures, and slight translucence to enhance opalization.
- Prepare workspace: Set up a well-lit area with a jeweler's loupe and secure the potch using a vice.
- Shape and trim: Mark cutting lines and use a diamond saw and Dremel tool to refine the potch's shape.
- Polish meticulously: Start with 3,000 grit diamond paste and progress to finer pastes up to 50,000 grit to enhance luster.
- Enhance color and patterns: Trim excess material, progressively grind the surface, and monitor under different lighting to optimize pattern visibility.
Selecting Quality Potch
Choosing quality potch is crucial to ensuring the success of transforming it into valuable opal. First, identify potch that has a uniform, consistent matrix. This guarantees the base is stable for opal formation.
Examine the potch for fractures or inclusions; avoid those with visible flaws, as they can compromise structural integrity. Next, assess the potch's silica content, as higher silica levels enhance the opalization process.
Utilize a loupe to inspect for potential play-of-color indicators, even if they're faint. Opt for potch that displays a slight translucence, as this often indicates a higher likelihood of color development.
Preparing Your Workspace
After obtaining high-quality potch, make certain your workspace is meticulously organized and equipped with the necessary tools to facilitate the opalization process.
Arrange a well-lit area to examine the potch's structure. Use a jeweler's loupe to inspect for potential opal veins.
Make sure your workbench has a secure vice to hold the potch steady during cutting. Have diamond-tipped tools ready for precise carving. A water-cooled trimming saw will help minimize heat damage.
Maintain a dust-free environment by using a fine mist spray to reduce airborne particles. Safety gear, including goggles and gloves, is essential to protect from sharp fragments.
Lastly, maintain a detailed logbook to document changes and observations during the transformation process, ensuring scientific rigor.
Shaping and Trimming
Begin by carefully evaluating the potch's contours to determine the best cutting path for revealing hidden opal layers. Use a loupe or magnifying glass to inspect the potch for any opal color play.
Mark lines with a non-permanent marker where you'll make your initial cuts. Employ a diamond saw to trim excess potch, ensuring minimal loss of potential opal. Maintain a steady hand and consistent pressure to avoid fracturing.
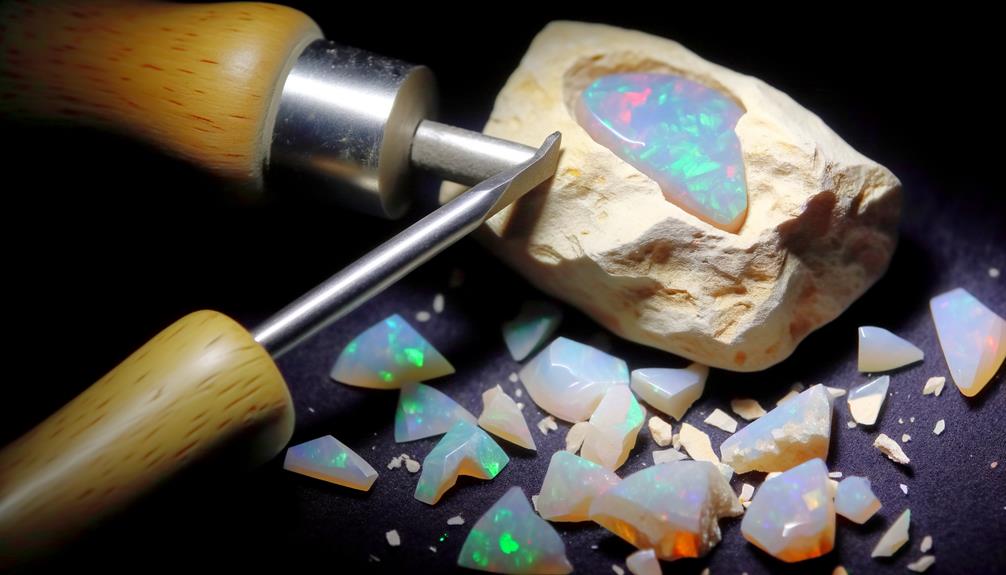
Next, use a Dremel tool with a diamond bit to refine the shape, following the natural lines of the opal. Continuously dip the stone in water to keep it cool and reduce dust. Your goal is a smooth, even surface that showcases the opal's brilliance without compromising its integrity.
Polishing Techniques
With the shape refined, it's time to focus on polishing techniques that will enhance the opal's natural luster and reveal its vibrant color play.
Start with a diamond paste of around 3,000 grit to remove any remaining scratches from the shaping process. Employ a felt or leather lap, keeping it slightly damp to prevent overheating. Gradually progress to finer diamond pastes, moving from 8,000 to 50,000 grit. Confirm each stage removes the scratches from the previous grit.
Enhancing Color and Patterns
To bring out the opal's vivid hues and intricate designs, employ a process called 'dopping' to securely mount the stone and facilitate precise manipulation.
First, attach the potch to a dop stick using wax or epoxy, ensuring stability during cutting. Use a diamond blade saw to carefully trim excess material, revealing potential color bars.
Next, apply a series of progressive grits to grind the surface, exposing the opal's natural play-of-color. Monitor the stone under various lighting conditions to optimize pattern visibility.
Conclusion
To sum up, creating alluring opal from potch demands meticulous selection, exacting preparation, and skilled polishing.
Through skillful shaping and trimming, you'll mold dazzling stones. Polishing methods turn coarse surfaces into magnificent gems.
Improving color and patterns with careful focus on specifics guarantees outstanding final outcomes.
This precise procedure, founded on scientific precision, effectively converts unassuming potch into breathtaking opal, revealing the splendor concealed inside.
Embrace this technique, and you'll produce your own radiant, dazzling opals.