Identify Raw Opal: A Comprehensive Guide
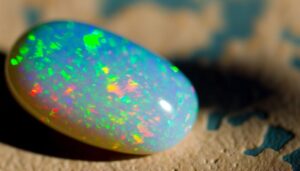
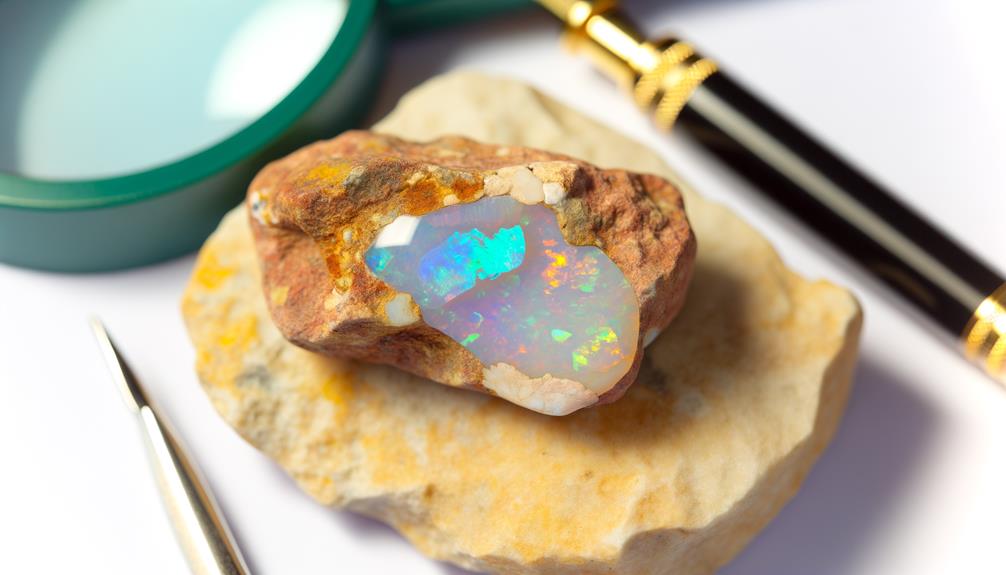
To identify raw opal, start by examining its play-of-color, which results from the diffraction of light through microscopic silica spheres. Rotate the opal under light to observe flashes of color.
Assess the body tone, which ranges from dark to light, affecting color visibility. Check for transparency by noting how light penetrates; opals can be see-through, semi-translucent, or cloudy.
Surface textures like natural ridges and valleys are essential clues. Use a magnifying glass to examine minute details and compare with known samples.
Understanding these techniques will enhance your ability to identify genuine raw opal effectively. For more advanced methods, further exploration awaits.
Key Takeaways
- Examine the opal under light to observe play-of-color and color patterns like pinfire or harlequin.
- Check the opal's transparency, noting if it is see-through, semi-translucent, or cloudy.
- Look for natural surface textures like pitting, irregularities, and fissures indicative of genuine opal.
- Compare the body tone, ranging from dark to light, which impacts the visibility of play-of-color.
- Perform a scratch test using a reference mineral to verify opal's hardness and authenticity.
Understanding Opal Formation
To understand opal formation, you need to grasp that opal is a mineraloid formed from the deposition of silica spheres in water-rich environments. When silica-rich solutions percolate through sedimentary rock, they deposit layers of microscopic silica spheres.
These spheres pack together in a regular pattern, creating a diffraction of light that gives opal its characteristic play-of-color. The process requires a delicate balance of conditions: the right concentration of silica, the correct pH levels, and a stable temperature range.
Over time, as water evaporates, the silica spheres solidify into opal. You'll find these formations in areas with a history of volcanic activity or hot springs, where the geological conditions promote silica deposition. Understanding this process helps you identify raw opal effectively.
Recognizing Opal Varieties
When identifying raw opal, you'll focus on common opal types like precious opal, fire opal, and common opal.
Examine the stone's color and patterns, noting the play-of-color, body tone, and transparency.
These characteristics help determine the opal variety and its potential value.
Common Opal Types
You'll find that identifying common opal types involves understanding key characteristics such as color, body tone, and play-of-color. Each type has unique traits you should recognize:
- Precious Opal: Exhibits a brilliant play-of-color, with flashes of red, blue, green, and other hues.
- Common Opal (Potch): Lacks play-of-color; typically appears in shades of white, gray, or brown.
- Boulder Opal: Contains ironstone matrix, often showcasing vibrant play-of-color against a dark background.
- Fire Opal: Known for its fiery hues of yellow, orange, or red; may or may not display play-of-color.
Understanding these types requires careful observation and familiarity with opal's unique characteristics, aiding in accurate identification.
Color and Patterns
Recognizing opal varieties involves analyzing specific color patterns, including the distribution and intensity of the play-of-color, body tone, and any distinctive inclusions.
First, observe the play-of-color—a phenomenon where flashes of different colors appear as light hits the opal. Note the color range, from blues and greens to rarer reds.
Next, assess the body tone, which refers to the opal's base color, ranging from dark (black opal) to light (white opal). Darker tones often enhance the play-of-color.
Examining Opal Colors
When examining opal colors, you'll notice a spectrum ranging from vibrant reds to subtle blues.
Pay attention to the play of light, characterized by opal's unique diffraction patterns.
This play-of-color effect results from the internal structure of silica spheres within the opal.
Spectrum of Colors
The spectrum of colors in opal, resulting from its unique internal structure, ranges from vivid reds and oranges to serene blues and greens, each hue determined by the diffraction of light through microscopic silica spheres.
When examining opal colors, consider the following:
- Size of Silica Spheres: Larger spheres produce red hues, while smaller ones result in blue.
- Arrangement: The uniformity and tightness of the silica sphere packing influence color brightness.
- Transparency: Observe whether the opal is transparent, translucent, or opaque, as this affects color intensity.
- Body Tone: The background color (black, white, or crystal) impacts the visibility and vibrancy of the spectral colors.
Understanding these factors helps you precisely identify the color spectrum in raw opal, enhancing your appreciation of this gemstone's natural beauty.
Play of Light
By observing how light interacts with the opal's internal structure, you can discern the gemstone's characteristic play of light, known as 'opalescence.' This phenomenon results from the diffraction of light through the silica spheres within the opal.
When light enters the stone, it bends, splits, and refracts, creating spectral colors. The size and arrangement of these silica spheres determine the specific colors and intensity of the opalescence. Smaller spheres produce blue and violet hues, while larger ones yield reds and oranges.
For precise analysis, examine the opal under varied lighting conditions and angles. This practice will help you identify the full range of colors and the quality of the opalescence, enhancing your ability to evaluate raw opals accurately.
Observing Play-of-Color
In identifying raw opal, you should carefully examine its play-of-color, a phenomenon where flashes of spectral colors appear within the stone due to its unique internal structure. This characteristic is vital in determining genuine opals. To observe this effect, follow these steps:
- Angle the stone: Rotate the opal in various directions under a light source.
- Assess color intensity: Note the brightness and clarity of the colors.
- Identify color patterns: Look for distinctive patterns, such as pinfire, harlequin, or broadflash.
- Evaluate uniformity: Check if the play-of-color is consistent throughout the stone or localized.
These observations will help you distinguish high-quality opals from imitations and other minerals. Each step contributes to a thorough understanding of the opal's authenticity.
Checking for Transparency
Having assessed the play-of-color, now scrutinize the raw opal's transparency to further validate its authenticity. Evaluate the opal under a bright light source. Observe how light penetrates the stone.
Raw opals exhibit varying degrees of transparency: see-through, semi-translucent, or cloudy. See-through opals allow light to pass through entirely, revealing their internal structure. Semi-translucent opals diffuse light, offering a milky or semi-clear appearance. Cloudy opals block light completely, appearing solid.
Consider the opal's type: crystal opals are see-through, while common opals are typically cloudy. Use magnification to observe any internal structures or reflections. Consistency in transparency across the specimen is vital. Any irregularities may indicate impurities or imitations.
Your meticulous observation guarantees an accurate identification of the raw opal.
Identifying Common Inclusions
Spotting common inclusions in raw opal requires keen observation and a thorough understanding of the stone's natural imperfections. You'll often encounter various inclusions that can affect both the aesthetic and value of the opal. Be on the lookout for:
- Sand: Tiny grains or patches embedded within the opal.
- Clay: Residues that may appear as streaks or blobs.
- Ironstone: Darker minerals that can create contrasting patterns.
- Potch: Non-precious opal layers without play-of-color.
Each inclusion varies in appearance and impact. Sand and clay inclusions could reduce clarity, while ironstone might add unique character. Potch layers can mask the opal's brilliance.
Assessing Opal Luster
Understanding the impact of inclusions leads to the next critical factor in evaluating raw opal—its luster, which directly influences the stone's overall brilliance and appeal.
Luster describes the way light interacts with the opal's surface. You should examine whether the opal has a vitreous (glass-like) or resinous (amber-like) luster. A high-quality raw opal displays a vitreous luster, indicating a polished, reflective surface. In contrast, a resinous luster suggests a duller finish and lower quality.
Additionally, consider the opal's transparency; a more transparent stone generally exhibits better luster. Rotate the opal under a light source to observe these characteristics. Consistently high luster across the surface signifies a valuable specimen, enhancing its desirability and market value.
Testing Opal Hardness
To accurately determine an opal's hardness, you should use the Mohs scale of mineral hardness, which ranges from 1 (talc) to 10 (diamond). Opals typically fall between 5.5 and 6.5 on this scale.
Follow these steps:
- Select a reference mineral: Choose a mineral of known hardness close to opal's expected range.
- Perform the scratch test: Gently scratch the opal with the reference mineral.
- Observe the result: If the opal gets scratched, it's softer than the reference mineral.
- Confirm hardness: Repeat with different minerals to narrow down the exact hardness.
Using these steps ensures consistent and accurate results.
Always handle the opal carefully to avoid damaging its structure. Proper testing provides a reliable hardness assessment, essential for identification.
Surface Texture Clues
When examining raw opal, pay attention to natural roughness indicators that suggest minimal human interference. Irregular surface patterns can reveal the stone's geological formation processes.
Additionally, observe how color play interacts with the texture; this can be vital in identifying genuine opal.
Natural Roughness Indicators
Natural roughness indicators such as pitting, irregularities, and a lack of consistency on the surface texture are crucial in distinguishing raw opal from other minerals.
When analyzing a specimen, focus on these key aspects:
- Pitting: Search for small depressions or cavities that are naturally formed.
- Irregularities: Identify uneven or rugged areas that result from geological processes.
- Lack of Consistency: Take note of the varying texture that sets it apart from smoother, polished stones.
- Fissures: Inspect any small cracks or fractures that indicate natural formation pressures.
These characteristics are fundamental for precise identification.
By paying close attention to these surface texture clues, you'll be better equipped to recognize raw opal amidst other minerals.
Be sure to examine the sample under good lighting for optimum results.
Irregular Surface Patterns
Examining the intricate surface patterns of raw opal, you'll often encounter a complex interplay of ridges, valleys, and undulating textures that reveal its geological history. These surface irregularities are key indicators of natural formation processes.
Look closely at the ridges—they're typically uneven and may vary in height and width, indicating sedimentary layers compressed over time. Valleys between these ridges can appear as deep grooves or shallow depressions, reflecting the mineral's response to environmental pressures.
Undulating textures often suggest fluid dynamics, where silica-rich solutions have deposited the opal in a fluctuating manner. By analyzing these patterns, you can better understand the raw opal's formation and authenticity, distinguishing it from man-made or synthetic counterparts with unnatural uniformity.
Color Play on Texture
How does the texture of raw opal influence its characteristic play of color, a phenomenon known as 'opalescence,' that distinguishes genuine opal from imitations?
The surface texture of raw opal directly affects how light interacts with its internal structure.
When examining raw opal, consider these key factors:
- Microscopic Silica Spheres: The arrangement of these spheres creates diffraction, producing the color play.
- Surface Irregularities: Natural bumps and ridges can enhance light interaction, intensifying opalescence.
- Fracture Patterns: Look for conchoidal fractures, indicative of natural formation.
- Polish and Luster: Genuine raw opal will exhibit a vitreous to sub-vitreous luster, setting it apart from imitations.
Weighing and Measuring
To accurately determine the value of raw opal, you must carefully weigh and measure each specimen using calibrated scales and precise calipers. Start by placing the opal on a precision electronic scale to obtain its weight in grams. Make sure the scale is zeroed for accuracy.
Next, use digital calipers to measure the dimensions of the opal. Record the length, width, and height to the nearest millimeter. These measurements will help you calculate the volume and assess the stone's density, which is essential for evaluating quality.
Consistency in your measurements is key; even minor deviations can greatly impact value assessments. By adhering to these meticulous methods, you'll gather the accurate data necessary for a precise valuation of raw opal.
Using a Magnifying Glass
After obtaining precise measurements and weight, use a high-quality magnifying glass to inspect the opal's surface for flaws, inclusions, and color play, which are critical factors in determining its quality and value.
Look closely for:
- Inclusions: Tiny mineral deposits or fractures within the opal that can affect its structural integrity.
- Color Play: The unique phenomenon where colors shift and change under light, indicating high-quality opal.
- Surface Flaws: Scratches or chips that might diminish the opal's visual appeal and value.
- Clarity: The transparency or translucency of the opal, as clearer stones are typically more valuable.
Using a magnifying glass allows you to make a detailed analysis, ensuring you accurately assess the opal's worth.
Comparing to Known Samples
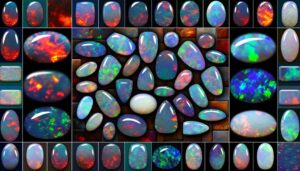
By comparing your raw opal to known samples, you can accurately gauge its quality and identify its specific type, such as black opal, white opal, or boulder opal. Examine the opal's body tone, play-of-color, and clarity. Utilize a detailed reference chart to make precise comparisons.
| Opal Type | Characteristics | Example Locations |
|---|---|---|
| Black Opal | Dark body tone, vibrant play-of-color | Lightning Ridge, Australia |
| White Opal | Light body tone, subtle play-of-color | Coober Pedy, Australia |
| Boulder Opal | Ironstone matrix, unique patterns | Queensland, Australia |
Match these traits with your specimen. Carefully compare color intensity and pattern uniformity. Precision is crucial—tiny differences can affect valuation. Use high-quality images or physical samples as benchmarks. This analytical approach guarantees an accurate identification.
Conclusion
By carefully following these steps, you'll master identifying raw opal.
Imagine you find a rough stone in the Australian outback. You notice its unique play-of-color and vibrant hues, confirming it's an opal.
Using a magnifying glass, you observe its surface texture and transparency, comparing it to known samples for accuracy.
Precise measurements further validate your find.
With these techniques, identifying raw opal becomes a methodical process, ensuring accurate and confident identification.


